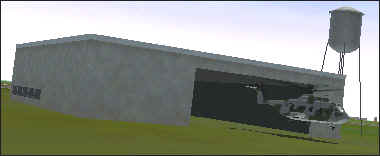
If the FARP is not repaired after a period of time, it will
dismantle itself but leave behind a residue of its presence, tents, landing mats etc. The
campaign map icon will eventually be removed once it has finally closed. This may take
some time.
Ground Advance Stalls
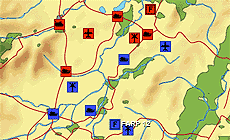
Examine the map for areas where the ground advance has
"stalled". Look for friendly ground units on the same road as an enemy ground
unit.
When an advancing unit comes into range of an enemy ground
force, it will stop and begin to attack with it's available weapons - usually the main
battle tanks will proceed to lob shells over several kilometers at the blocking force. The
unit will also send a radio message - see below.
The blocked ground unit can not advance until the
blocking force has been eliminated.
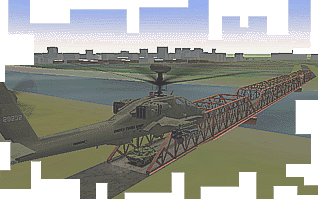
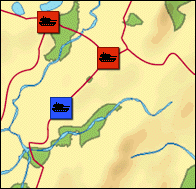 |
figure 4-3: Ground advance stall |
Be aware, should the blocking enemy be hit
by a shell, it will radio for immediate air support. A retaliatory attack by enemy
helicopters can take anything from a few minutes to half an hour depending on the
proximity of available forces. Also, enemy tanks will return fire - again lobbing shells
over several kilometers.
Note: due to terrain considerations, it may not be
posssible for the engaged ground forces to hit each other. As there is no "curve of
sight" routine in the simulation, tanks could be firing shells into a forest canopy
that just happens to be in the way. If this situation occurs, tanks will needlessly use up
their ammunition - stop to reload - then continue blindly wasting ammunition. The only way
out of this cycle is if the blocker or blocking unit is eliminated by air forces.
So always keep a look out for ground advance stalls. You
can fly into the area and clean out the enemy, thus allowing your ground forces to
continue.
(Remember, what ever applies to your forces, also applies
to the enemy forces)
Ground Unit Radio Messages
If you are within radio range of a ground unit (max range
is 32km), the ground controller will radio various signals under certain conditions.
If a ground units advance is blocked they will
radio:
- "This is ground control,
requesting support"
- "This is ground control, we need air support"
If a ground unit comes under attack by enemy
forces they will radio:
- "We are pinned down by enemy
fire"
- "We are taking heavy fire, requesting aerial
assisstance"
When your ground forces advance forwards or
retreats, they radio:
- "This is ground control, we
are advancing"
- "This is ground control, we are retreating"
Who said that? - Although it is hard to
determine who sent the transmission, there are some clues. The sound volume of the radio
message is determined by the distance from transmission source. The fainter the message,
the further away. Look at the campaign map and examine the roads and distances. The
presence of enemy units near your ground forces give a clue as to who radioed for
assisstance.
Ground Force Movement AI
How does the AI decide to move ground forces? The advance
and direction of ground units is determined by pre-designed "warmth" map.
Each ground unit heads towards a road junction (or junction
"node" to give it a techie name) that has the hottest value on the hidden warmth
map. Assuming you could overlay the network of roads over the warmth map and sample the
values that lay under each road junction. The junction with the highest value is the
direction the ground unit will head towards.
| Cuban Theater Warmth Maps |
| Blue Force |
Red Force |
 |
 |
figure 4-4: ground
forces attracted to lighter areas. |
Every time a unit reaches a road junction,
it stops and waits a pre-determined time before checking the "map" again and
deciding which way to turn.
Most campaign objective sectors are hand placed so ground
forces following the "map" should eventually pass through them. However some
units will get stuck at dead ends. Or bypass some sectors.
The warmth maps and objective sectors are editable with
Adobe PhotoShop. Details on this can be found in a later chapter.